How to Baby Proof a House in a Nutshell
When you’re preparing your home for a baby, baby proofing can feel overwhelming. The good news is that with a systematic approach, you can create a safe environment for your little one. Baby proofing involves assessing risks, prioritizing rooms, installing safety devices, and maintaining supervision.
Here’s a quick checklist to get started:
- Outlet covers: Prevent electrical shocks.
- Cabinet locks: Secure hazardous items like cleaning supplies.
- Safety gates: Block off stairways and unsafe areas.
- Furniture anchors: Prevent heavy items from tipping over.
- Cord organizers: Keep cords out of baby’s reach.
Pro Tip: Always start with the rooms your baby will spend the most time in, like the living room and nursery.
Why Baby Proofing Matters
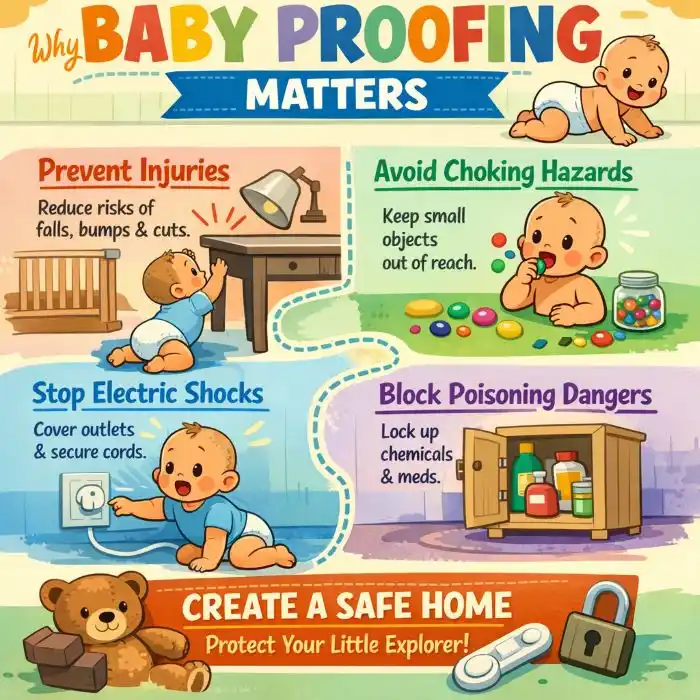
The Risks for Babies and Toddlers
Babies are naturally curious explorers, which is both exciting and nerve-wracking for parents. However, their curiosity also makes them prone to injuries. Common causes of accidents include:
- Falls: Babies can easily fall from beds, couches, or stairs.
- Poisoning: Household cleaners, medications, and even some plants can be toxic.
- Burns: Hot surfaces, liquids, and electrical outlets pose significant risks.
- Choking: Small objects, toys, or even food can become choking hazards.
Baby proofing isn’t about eliminating every single risk (that’s impossible!). Instead, it’s about drastically reducing the chances of preventable injuries.
When to Start Baby Proofing
Timing is everything. Baby proofing should align with your child’s developmental milestones:
- Newborn (0–3 months): Focus on sleep safety (e.g., crib setup).
- 4–9 months: As babies begin rolling and sitting, it’s time to secure furniture and remove choking hazards.
- 6–12 months: Crawling calls for more comprehensive proofing—think gates, outlet covers, and locked cabinets.
- 9–18 months: Once your child starts pulling up and walking, secure heavy furniture and keep dangerous items out of reach.
By starting early and adapting as your baby grows, you’ll stay ahead of potential hazards.
A Simple 6-Step Baby-Proofing Plan
Creating a safe home doesn’t have to be complicated. Follow these six steps for an effective baby-proofing process:
Do a Hazard Walk-Through
Get down to your baby’s level—literally. Crawling around the house will give you a child’s-eye view of potential dangers. Look for small objects, unsecured furniture, reachable cords, and sharp edges.
Prioritize by Risk and Room Usage
Focus on high-risk areas like the kitchen, stairs, and bathroom. Rooms where your baby spends the most time should be baby-proofed first.
Differentiate Between Quick Fixes and Permanent Fixes
Some solutions, like baby gates, can be temporary. Others, like anchoring furniture, require a more permanent approach.
Buy Essentials and Install Them
Invest in items like outlet covers, cabinet locks, and furniture anchors. Install them securely following manufacturer instructions.
Practice Supervision and Safe Routines
No amount of baby proofing replaces supervision. Always keep an eye on your baby, especially in higher-risk areas like the kitchen and bathroom.
Re-Check as Baby Develops
As your child grows and becomes more mobile, new hazards arise. Make a habit of reassessing your setup monthly or at major milestones.
Here’s a priority table to help you get started:
| Item | Why It’s Important | Time to Install |
|---|---|---|
| Outlet Covers | Prevents electrical shocks | Less than 5 minutes |
| Furniture Anchors | Stops tipping accidents | 10–15 minutes per item |
| Safety Gates | Blocks dangerous areas | 10–20 minutes per gate |
| Cabinet Locks | Secures hazardous materials | 5–10 minutes per cabinet |
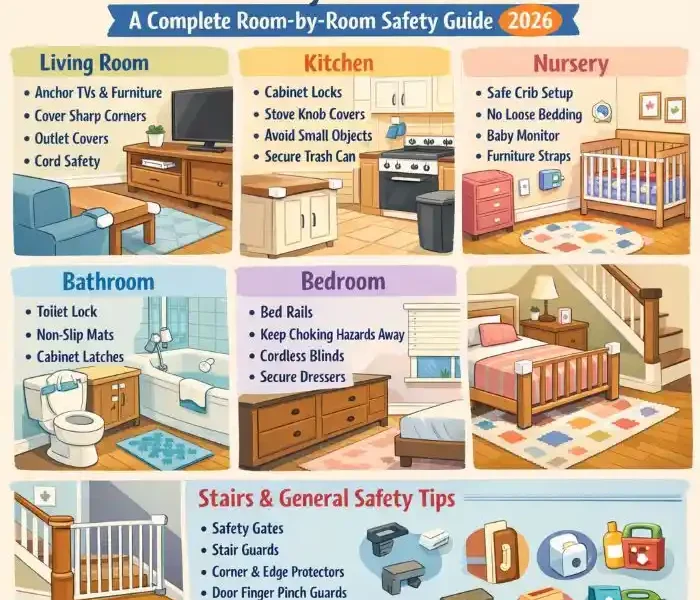
Room-by-Room Baby Proofing Checklist
The best way to baby proof your home is to work room by room. Use this checklist to tackle each space effectively.
Living Room / Play Area
- Anchor heavy furniture and TVs to prevent tipping.
- Remove small objects, like coins or buttons, that pose choking hazards.
- Secure cords with organizers or cord covers.
- Install edge and corner guards on sharp furniture.
- Use fireplace screens or guards for safety.
- Ensure window blind cords are cordless or tied securely.
- Cover all accessible outlets with outlet covers.
- Move plants, chemicals, and small decor out of reach.
Suggested Products: Corner guards, TV straps, outlet covers.
Kitchen
- Use stove knob covers and stove guards to prevent burns.
- Store sharp utensils and chemicals in high, locked cabinets.
- Install childproof locks on drawers and cabinets.
- Keep small appliances unplugged and cords out of reach.
- Avoid tablecloths or placemats that can be pulled down.
Suggested Products: Cabinet locks, appliance locks, stove knob covers.
Stairways and Doors
- Install safety gates at the top and bottom of all stairs.
- Use hardware-mounted gates for top stairs for extra security.
- Add doorknob covers or locks to prevent access to off-limits rooms.
- Keep exterior doors locked at all times.
Note: Pressure-mounted gates work well for doorways but aren’t safe for stairs.
Bathroom
- Install toilet lid locks to prevent drowning hazards.
- Use anti-slip mats in the tub and on the floor.
- Set your water heater to a safe temperature (120°F or lower).
- Store medications and cleaners in locked cabinets.
- Always supervise your baby during baths.
Suggested Products: Toilet locks, anti-slip mats, bath thermometers.
Bedroom / Nursery
- Follow safe sleep practices: use a firm mattress, fitted sheet, and no soft bedding or toys in the crib.
- Anchor dressers and bookshelves to the wall.
- Keep monitor cords and window treatments out of reach.
- Use cordless blinds or secure cords safely.
Crib Checklist:
- Slat spacing should be less than 2 3/8 inches.
- The mattress should fit snugly with no gaps.
Garage, Basement, and Backyard
- Lock away hazardous materials like paint, tools, and chemicals.
- Secure heavy equipment and lawn tools.
- Cover pools and ponds with approved barriers or pool alarms.
- Use self-latching gates for fences.
Suggested Products: Pool alarms, fence gate latches.
Safety Products: What to Buy and What to Skip
Must-Have Baby Proofing Products
- Outlet covers
- Cabinet and drawer locks
- Safety gates
- Furniture straps
- Corner guards
- Stove knob covers
- Toilet lid locks
- Door lever locks
Helpful Extras
- Baby monitors and cameras
- Cordless blinds
- Anti-slip mats
- Baby-proof bath thermometers
What to Avoid
- Cheap adhesive-only straps for heavy furniture.
- Doorknob covers on exterior doors (they can hinder emergency exits).
Installation and Maintenance Tips
Installation Tips:
- Use hardware-mounted options for gates and furniture anchors.
- Follow instructions carefully for all safety products.
- Test installations regularly to ensure they remain secure.
Maintenance Routine:
- Check for wear and tear monthly.
- Test safety gates and locks weekly.
- Re-anchor furniture if you move it.
Supervision, Habits, and Teaching Safety
While baby proofing reduces risks, supervision is irreplaceable. Develop good habits, like keeping hot drinks away from edges and always carrying your phone and keys.
Teach older siblings to pick up small toys and avoid giving tiny objects to the baby. Create a clear instruction list for babysitters or caregivers to follow.
Common Mistakes and How to Avoid Them
Here are some common baby-proofing errors and how to fix them:
- Not anchoring heavy furniture: Use reliable hardware anchors.
- Ignoring cords behind furniture: Use cord covers or organizers.
- Using adhesive-only straps for heavy items: Opt for hardware-mounted solutions.
Costs and Time Estimate
Cost Breakdown:
- DIY Basics: $50–$150
- Mid-Range: $150–$500
- Professional Installation: $500+
Time Estimate:
- Each room can take 1–2 hours.
- A whole house can be completed in a weekend.
FAQs
When Should I Start Baby Proofing?
Begin baby proofing around 4–6 months, before your baby starts crawling.
Do I Need to Baby Proof Before They Crawl?
Yes! Babies develop quickly, so it’s better to start early.