Get Creative in the Kitchen Cabinets: Easy Steps for Painting Your Cabinets and Adding Personal Touches
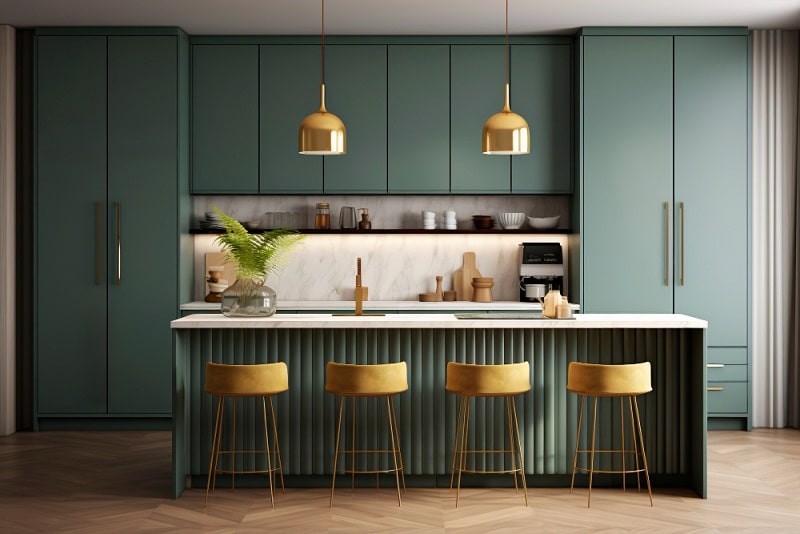
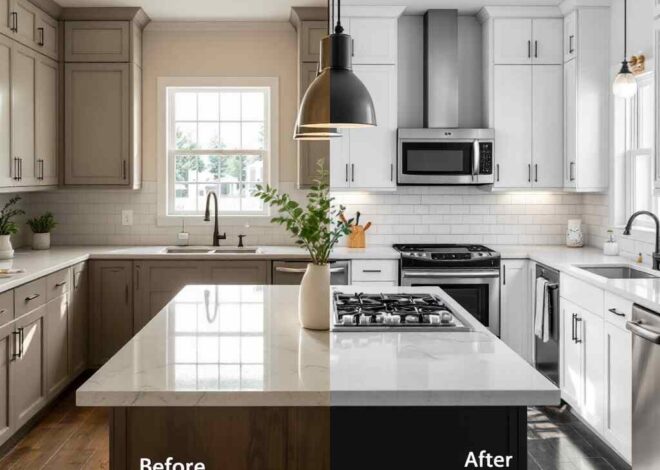
Are you tired of your plain, boring kitchen cabinets? Ready to add some flair and personality to your space? It’s time to get creative in the kitchen! In this blog post, we’ll show you easy steps for painting your cabinets and adding personal touches that will make your kitchen truly one-of-a-kind. Get ready to unleash your inner artist and transform your kitchen into a work of art!
Introduction to painting kitchen cabinets and adding personal touches
Are you ready to transform your kitchen into a space that reflects your unique style and personality? Painting your cabinets and adding personal touches is the perfect way to breathe new life into one of the most important rooms in your home. Whether you’re aiming for a sleek modern look or a cozy farmhouse feel, getting creative in the kitchen is easier than you think. Let’s dive into easy steps that will help you achieve stunning results with just a little bit of effort and imagination!
Importance of updating and personalizing your kitchen space
Updating and personalizing your kitchen space is essential for creating a welcoming environment that reflects your style and personality. By giving your cabinets a fresh coat of paint and adding personal touches, you can transform the entire look and feel of the room.
A well-designed kitchen not only enhances the aesthetic appeal of your home but also increases its overall value. It’s where family gatherings happen, meals are prepared with love, and memories are made.
Adding personalized elements like unique hardware, decorative accents, or a pop of color can elevate the design to make it truly yours. Whether you prefer a sleek modern look or cozy farmhouse charm, updating your kitchen allows you to express yourself creatively.
Don’t underestimate the impact that small changes can have on the ambiance of your space. Infusing your kitchen with elements that resonate with you will create a sense of comfort and joy every time you step into the heart of your home.
Step 1: Preparing Your Cabinets for Painting
Before you dive into transforming your kitchen cabinets with a fresh coat of paint, it’s essential to prepare the surface properly. Start by giving your cabinets a good clean to remove any grease or dirt buildup that could affect the paint’s adhesion. Use a mild detergent and water solution for this task.
Once your cabinets are squeaky clean, it’s time to sand them down lightly. Sanding helps create a rough surface for the new paint to grip onto, ensuring better durability and longevity of your cabinet makeover. Focus on areas with existing finishes that may be peeling or chipping.
Next up, take off all hardware such as knobs, handles, and hinges. Removing these components will not only make painting easier but also give you the opportunity to update them if desired once the painting is complete. Keep track of all screws and small pieces in labeled bags for easy reassembly later on.
By taking these careful steps in preparing your cabinets before painting, you’re setting yourself up for success in achieving a professional-looking finish that will breathe new life into your kitchen space!
Cleaning and sanding the surface
Before you start painting your kitchen cabinets, it’s crucial to ensure the surface is clean and smooth for optimal results. Begin by removing all items from the cabinets and clearing the surrounding area.
Use a mild detergent solution to thoroughly clean the cabinet surfaces, removing any grease, grime, or residue that may have accumulated over time. This step is essential for allowing the paint to adhere properly.
Once cleaned, lightly sand the surfaces with fine-grit sandpaper to create a rough texture that will help the paint bond effectively. Focus on areas where there may be existing imperfections or glossy finishes.
After sanding, wipe down the cabinets with a damp cloth to remove any dust particles before proceeding to apply primer. Properly preparing your cabinets ensures a professional-looking finish that will stand up to daily wear and tear in your kitchen space.
Removing hardware and doors
When it comes to painting your kitchen cabinets, one crucial step is removing the hardware and doors. This might seem like a tedious task, but trust me, it’s worth the effort for a flawless finish.
Start by unscrewing and carefully labeling each piece of hardware. Place them in labeled bags or containers to ensure nothing gets misplaced during reassembly later on.
Next, use a screwdriver to remove the cabinet doors from their hinges. Lay them flat on a work surface to make painting easier and more even.
Don’t forget about any additional items like shelves or drawers that also need attention. Taking the time now to remove everything will result in a more professional-looking outcome when you’re done with your painting project.
Step 2: Choosing the Right Paint and Supplies
When it comes to painting your kitchen cabinets, choosing the right paint and supplies is crucial for a successful outcome. First off, consider opting for a high-quality enamel paint specifically designed for cabinets; these paints are durable and provide a smooth finish that can withstand daily wear and tear.
Next, gather all the necessary tools and materials before starting your project. You’ll need items like brushes or rollers suitable for cabinet surfaces, painter’s tape to protect surrounding areas, sandpaper for prepping the surface, as well as primers if required. Don’t forget about drop cloths to protect your floors from any potential drips or spills.
Make sure to select colors that complement your kitchen’s aesthetics while also reflecting your personal style. Neutral tones like whites or grays offer a timeless look, while bolder hues can add a pop of personality to the space. Take time to test paint samples on a small area of your cabinets before committing to ensure you’re happy with the color choice.
Investing in quality paints and supplies may require a bit more upfront cost but will ultimately save you time and frustration down the line by providing better coverage and durability. By taking care in selecting the right products for your cabinet painting project, you set yourself up for success in achieving beautiful results that elevate your kitchen space.
Types of paint suitable for cabinets
When it comes to painting your kitchen cabinets, choosing the right type of paint is crucial for a durable and long-lasting finish. Opting for a high-quality enamel paint specifically designed for cabinets can make all the difference in achieving professional results.
Acrylic-based paints are a popular choice due to their durability and ease of application. They dry quickly, making them ideal for busy kitchens where downtime is limited. Oil-based paints offer excellent durability and a smooth finish but require more time to dry and proper ventilation during application.
Water-based latex paints are another option that provides low odor, easy cleanup with soap and water, and dries quickly. They are also less prone to yellowing over time compared to oil-based options.
Whichever type of paint you choose, make sure it’s formulated for use on cabinets to ensure optimal adhesion and longevity for your newly refreshed kitchen space!
Necessary tools and materials
When it comes to painting your kitchen cabinets, having the right tools and materials on hand is essential for a successful project. First and foremost, you’ll need high-quality paint specifically designed for cabinets. Look for durable options that can withstand daily wear and tear in the kitchen.
In addition to paint, gather supplies like primer, sandpaper, painter’s tape, brushes or rollers, drop cloths to protect your floors from drips or spills. Don’t forget about hardware such as screwdrivers or drills for removing cabinet doors and handles before starting the painting process.
Having all the necessary tools at your disposal will streamline the painting experience and help you achieve a professional-looking finish. So be sure to stock up on everything you need before diving into this creative endeavor!
Step 3: Painting Your Cabinets
Now comes the fun part – painting your cabinets! After prepping and choosing the right supplies, it’s time to transform your kitchen space. Before diving in, ensure you have good ventilation for a smooth painting process.
Start by applying a primer coat to help the paint adhere better and prevent chipping. Use long, even strokes with a high-quality brush or roller for an even finish. Take your time and avoid rushing through this step.
Once the primer is dry, begin painting with your chosen color. Remember to work in thin layers to prevent drips or streaks. Allow each coat to fully dry before adding another layer for best results.
For a professional-looking outcome, consider using a paint sprayer instead of brushes or rollers. This method can result in a seamless finish that will make your cabinets look brand new!
Enjoy the process of transforming your kitchen with a fresh coat of paint on your cabinets – it’s amazing what a little color can do!
Techniques for achieving a smooth and even finish
Achieving a smooth and even finish on your newly painted kitchen cabinets will truly elevate the look of your space. By following these easy steps, you can transform your cabinets into personalized pieces that reflect your style and creativity. Remember, updating your kitchen doesn’t have to break the bank – with some paint, supplies, and a little bit of effort, you can breathe new life into your kitchen cabinets and make them the focal point of your culinary haven. So get creative in the kitchen today by painting your cabinets and adding those personal touches that will make it uniquely yours!


